Well, this project took a little longer than expected. Between letting the Mod Podge and the glitter dry, and me nit-picking over every last detail... here we are two weeks later. Sometimes, I really prefer working under deadlines. It's one of the reasons I really miss being on design teams. Having a deadline forces me to make quick decisions, and move things along. When I'm just left to my own devices, my brain works a little something like this: Gold glitter. No, platinum glitter. Or, maybe antique gold glitter. No, gold. Or maybe BLUE. Yeah. That can go on for an hour. No joke. But, internal glitter arguments aside... here she is!

She didn't turn out exactly the way I had envisioned it in my head. It never really does, does it? But, I'm happy with her. I got the deer head when I visited my mom back in the fall. Michael's carries them. Or, at least the did. They're just made of the brown papier mache, and were with all of the boxes, bird houses, and project bases of that nature. We don't have a Michael's near us. The nearest one is in Nashville, an hour and a half away. And, it's not a good one. Hobby Lobby doesn't carry them, and I've scoured the internet to no avail. So, if anyone knows where to get more of these... hit me up! It's a really fun project. Let's get started!
Here is what you'll need...
Papier Mache Deer Head
1 Fat Quarter Worth of Fabric
Tape Measurer
Ruler
Disappearing Fabric Ink Pen
Pinking Shears
Micro Scissors
Fabric Mod Podge
Foam Brush
Martha Stewart Crafts Glitter Glue
Ultra Fine Glitter (I used Martha Stewart Crafts Fine Glitter in Florentine Gold)
Stiff Bristle Brush (Like A Stencil Brush)
False Eyelashes
Double-Sided Tape Sheet
1" Circle Punch
Brads
Black Diamond Stickles
1" Round Rhinestone
Ribbon
Hot Glue Gun
Step 1: Measure from the widest and tallest points of the deer head to figure our how much fabric you will need. I used a seamstress tape measurer so that I could form it to the shape of the head while measuring to assure there would be enough fabric. Mine measured 16" x 16".
Step 2: Iron your fabric so it's nice, and smooth.
Step 3: Measure, and mark off where to cut your fabric using your disappearing ink pen.
Step 4: Use pinking shears to cut out your fabric.
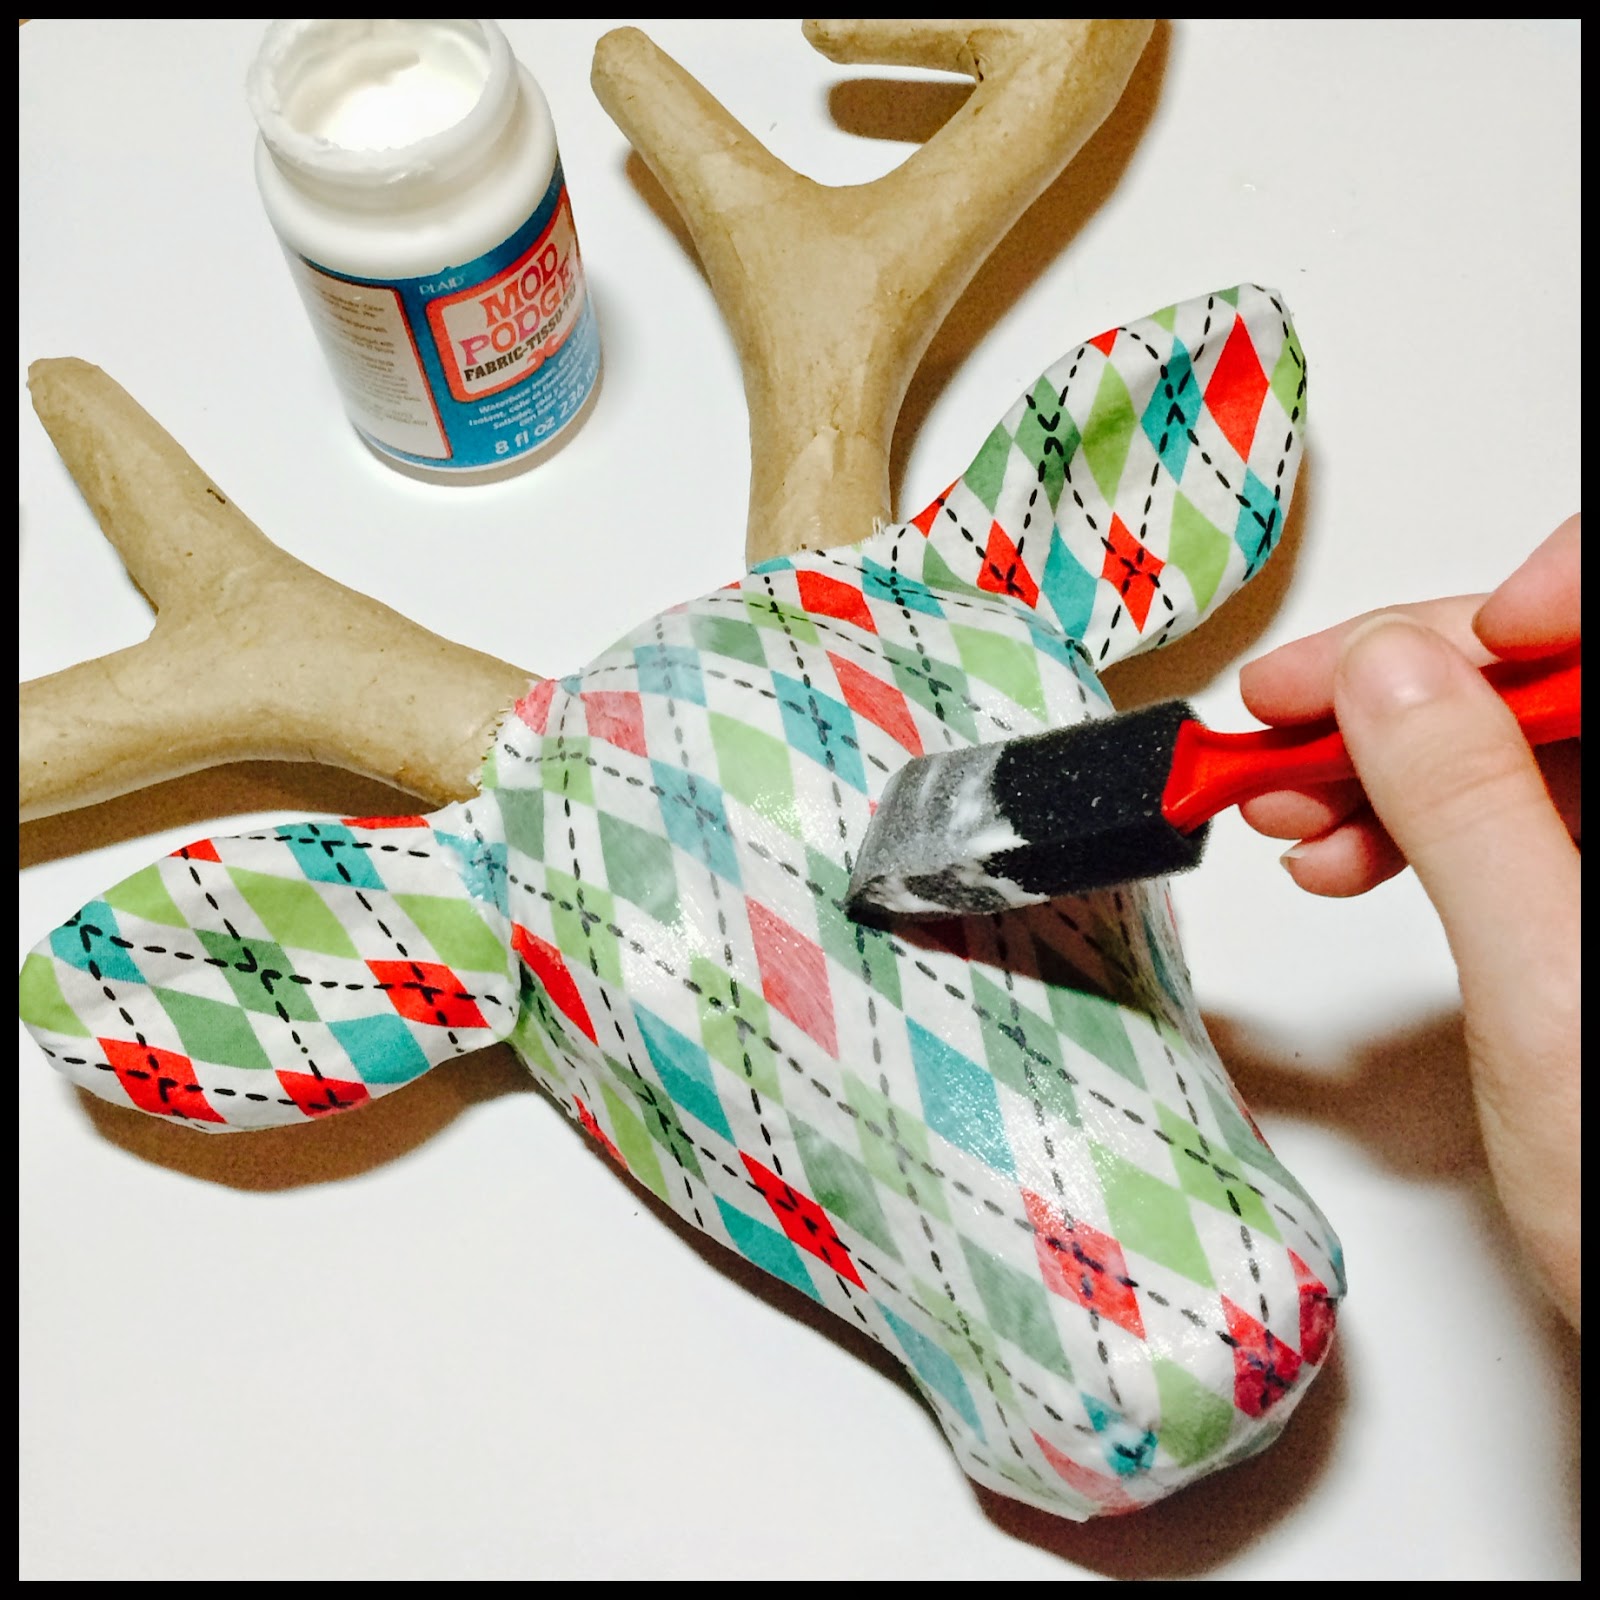
Step 5: Using a foam brush, apply a generous coating of Mod Podge to the area of your deer head that you want to start working. I began at the bottom of the nose.
Step 6: Adhere the fabric to the Mod Podge on the nose. Add more Mod Podge, and start working up the face. Stop around the bottom of where the ears begin.
Step 7: Apply Mod Podge to the sides of the face. Again, stop right around the bottom of the ear. Adhere the fabric.
Step 8: Once adhered to the sides of the face, use your pinking shears to make a diagonal cut from the edge of the fabric to the base of the ear. Repeat on other side. This allows your fabric a little give, and makes it easier to work the fabric to fit the form.
Step 9: Fold fabric into the back of the deer, and trim the excess fabric off. Leave about 1" worth of fabric to adhere into the back of the head.
Step 10: Apply Mod Podge to the back inside edge of the head. Fold fabric over, and adhere.
Step 11: Moving back to the front of the head... Make a neat little pleat in the fabric just underneath the ear. Secure with a little Mod Podge. This will neatly secure the extra fabric you will have in that area.
Step 12: Apply a generous layer of Mod Podge to the top of the ear.
Step 13: Adhere the fabric. Use your fingers to work the fabric into all of the nooks, and crannies until it is perfectly molded to the ear. I started referring to this as "fabric sculpting" because you really are working with it like you would clay... pinching, pulling, pushing until you get it formed into just the right shape!
**Tip: Make sure your hands are extra clean! Some Mod Podge will seep through the fabric when you are working with it like this. And, that's okay! It dries clear, and we will be applying a sealing coat on top later on. But, if your hands are dirty, it will make the glue dirty. And, especially on this white fabric... you WILL notice. I washed my hands several times during the process of working with the ears. Anytime I felt there was a build-up of glue on my fingers, I would make a trip back to the sink.**
Step 14: Once you are satisfied with the front of the ears, turn the head over. Trim around the edge of the ears using micro scissors. I left about a 1/2" lip that will adhere over the edges of the ears.
Step 15: Use your fingers (the foam brush is too big to work in this area) to apply Mod Podge to the edge of the ears. Adhere the fabric.
Step 16: Use the micro scissors to trim the fabric around the base of the antlers. DOn't worry if it isn't exactly perfect, or frays a bit. We will be covering it up with glitter later.
Step 17: Trim, and fold the remaining fabric until it fits neatly between the antlers with a 1" lip to tunk under, and secure inside the back of the head. Apply Mod Podge, and adhere fabric.
Step 18: Admire your work so far! Your deer head should look something like this. Set it aside, and let dry for 24 hours.
Step 19: Apply your sealing coat of Mod Podge. Let dry for at least 24 hours. I found mine to still be a bit tacky after than, and let it dry for a total of 48 hours. When dry, it should have a texture similar to oil cloth. You don't want it to be tacky AT ALL because next we will be applying glitter to the antlers, and you don't want that getting stuck in Mod Podge all over the face.
Step 20: Get ready to apply the glitter to the antlers. Martha Stewart glitter glue is my favorite to use for projects that require large areas of glitter application. It comes with a brush already inside the lid. Michael's carries it. But, you can also get it
here.
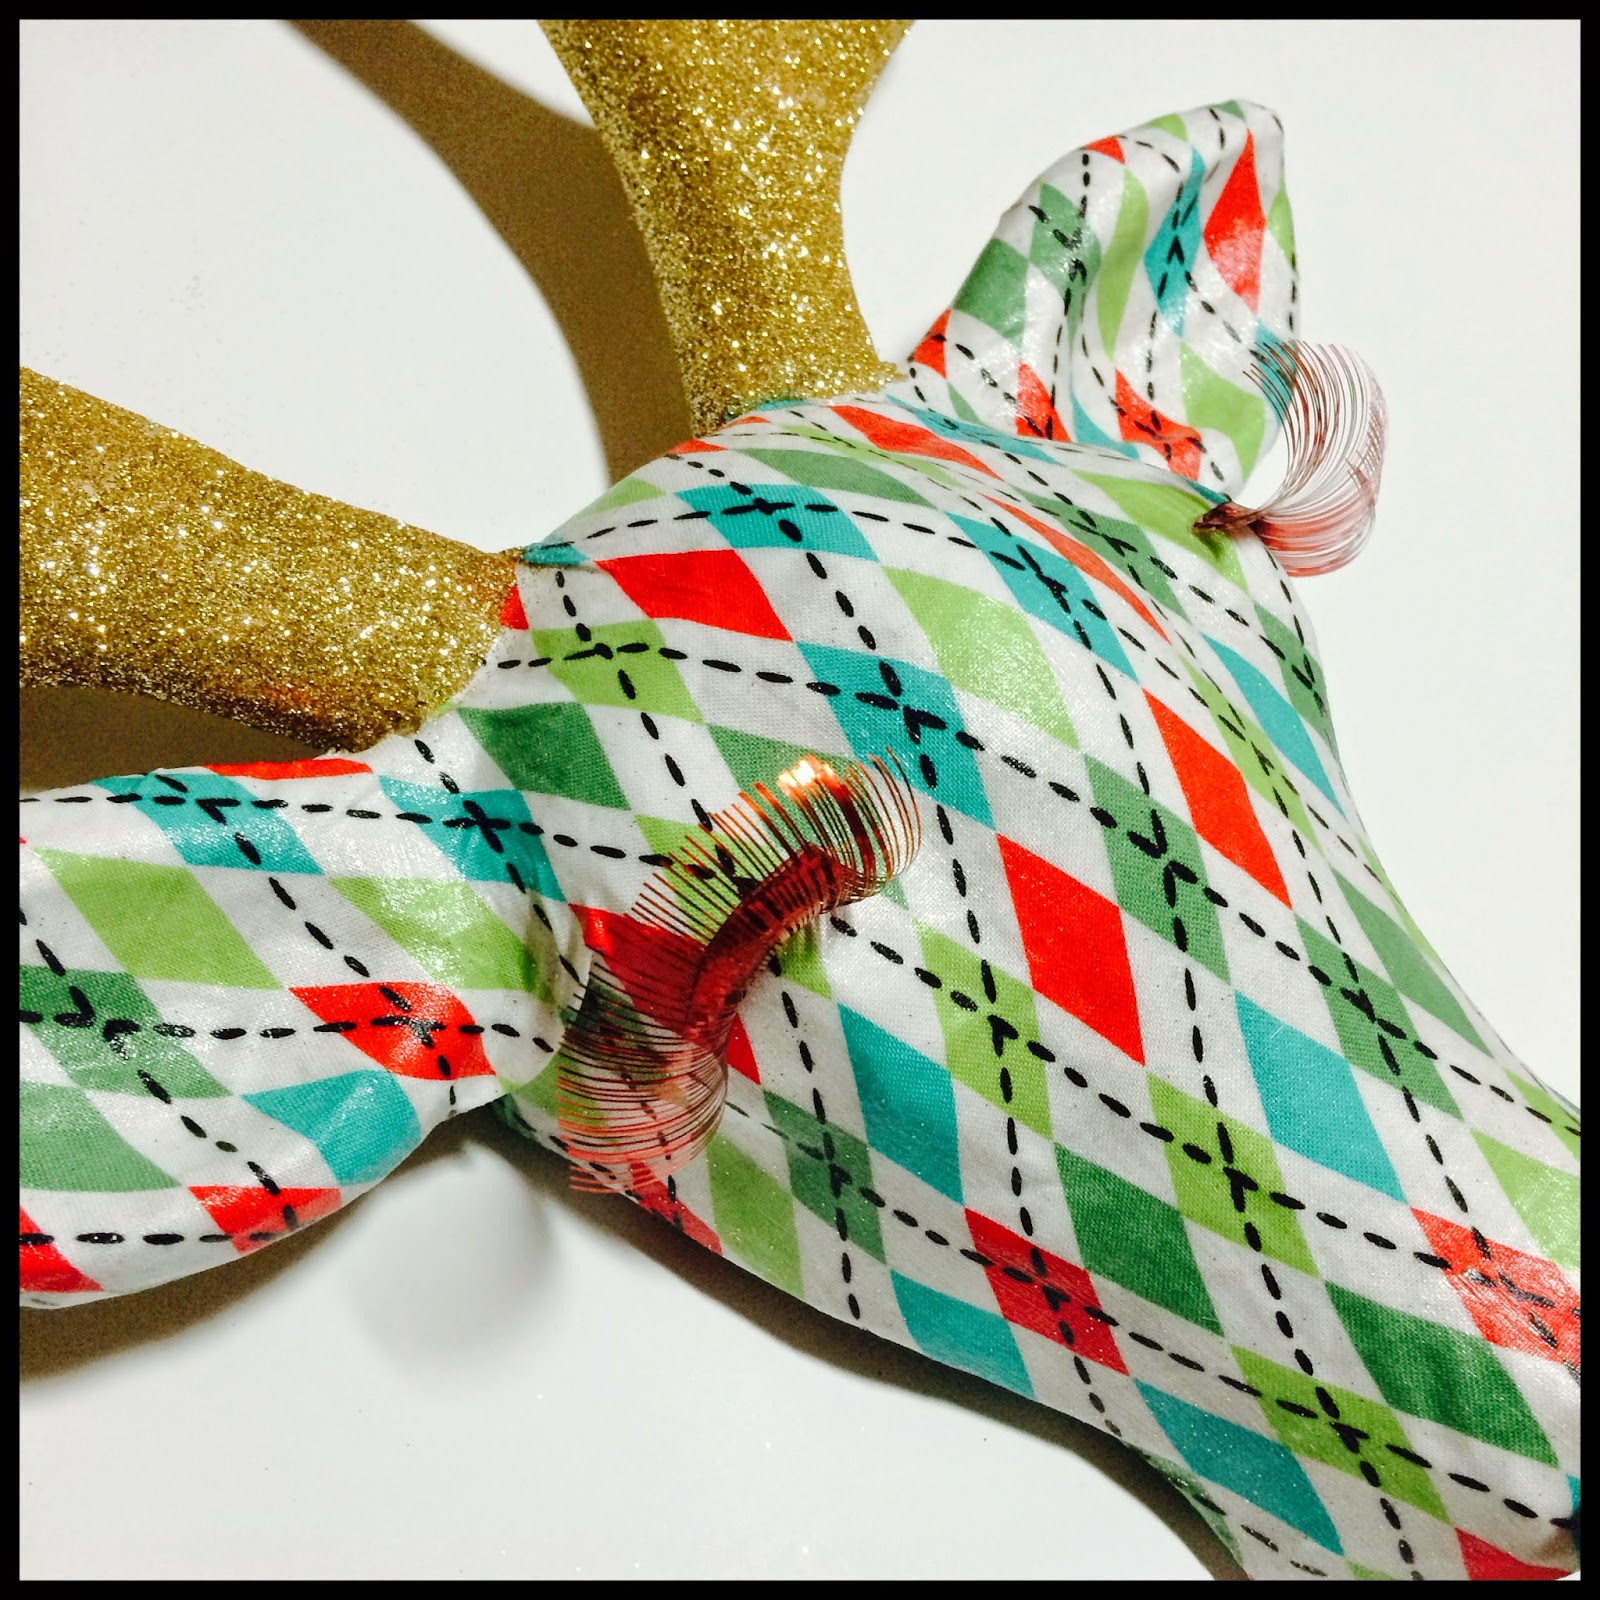
Step 21: Apply glue to the top area of the antlers. You can work in patches, so that the glue doesn't dry out.
Step 22: Sprinkle glitter over glue-covered area. Repeat until antlers are completely covered in glitter. Allow to dry for 24 hours.
Step 23: Once dry, use a really stiff bristle brush (I like to use a stenciling brush) to brush off any stray bits of glitter on the face of the deer.
Step 24: Now we can start constructing the face of the deer. I selected these pretty tinsel eyelashes. Originally, I had ordered silver. They sent me red. It was too much hassle to return them, so I just hung onto the red ones. I'm glad I did! They worked better than I believe the silver would have. Trim about 1/4" off of each eye so it will fit to the form.
Step 25: Use a tiny dot of hot glue at the corners of the lashes to adhere them to the head. This is one of my nit-picky things that took me FOREVER to get them exactly where I wanted them. So, be patient.
Step 26: Use your 1" circle punch to punch out 2 circles from the tape sheets. Or, if you're like me, and the movers lost your box of punches... use a 1" circle stencil to draw them, and cut them by hand. I have hoarded my Art Accentz Terrifically Tacky Tape sheets for years. They don't make them anymore. But, I imagine
these tape sheets from Ranger would work just as well.
Step 27: Peel off one side of the backing. Sprinkle glitter over the exposed sticky tape, and use your fingers to make sure it is generously well-adhered. Repeat for both circles.
Step 28: Peel off the other side of the tape, and adhere under the eyelashes on the deer head.
Step 29: Select some brads that you like. These are black pearl brads that are rimmed in silver. I've really been trying to de-stash so these are old. They're from the My Mind's Eye "Lush" collection. They're discontinued, but there are plenty of other companies that put out brads similar to these. Or, hey... dig through your stash! Take your micro scissors or a pair of wire snips, and cut off the prongs on the back of 2 brads so that the back is now flat.
Step 30: Use a dot of hot glue to adhere the brad to the glittered "eyeball." Repeat on second eye.
Step 31: The eyes didn't have quite the doe-eyed affect that I was looking for. So, I rimmed them with some black Stickles.
Step 32: Use a dot of hot glue to adhere the rhinestone nose.
Step 33: Tie a bow with some pretty ribbon. Use a dot of hot glue to adhere it to the top of the head.
Step 34: Stand back, and admire your craftiness!
This project allows for so many personal tweaks: fabric selection, glitter colors, etc. I even considered using some ribbon to hang some Christmas balls from her antlers, but decided against it. But, you can really get creative with these deer heads!
While my design is decidedly Christmasy, yours certain doesn't have to be. But while we're on the subject... a few years ago I did a fun project that ran all year long on the blog: "12 Months of Christmas." So, why don't we give it a go again in 2015?
I know a lot of us crafters are big into giving handmade gifts during the holidays. And, if you're anything like me, you'll come up on November faster than you can bat a red tinsel eyelash. Inevitably, you'll have a long list of gifts you want to make with not enough hours until Santa comes a knockin' to make them. The idea here is to knock out a gift a month throughout the year. It makes the holiday time SO. MUCH. EASIER. And, who doesn't need their holidays simplified in one way or another? So, my sweet little deer will be January's installment for the 12 months of Christmas (although it's a few days past January... darn those days spent waiting on that Mod Podge to dry)! Hahaha!
If you make a deer head... or even if this project inspires you to try another papier mache project... post them up in the comments! I'd love to see them. I'll be back on Monday with February's project for the 12 months of Christmas. See... I didn't let those hours of waiting on glue to dry go to waste... I just started on the next project!